Total Pageviews

Sunday, January 30, 2011

FOAM INSULATION

      In the latest issue of Claytimes there is an article about a tool that facilitates making hexagon and octagon shaped pots.  That sounded right up my alley because mandalas/kaleidoscopes are special to me and the divisions of a circle into equal sections is a basic step in that process.  I love the angles and repetitions.
     Problem was I didn’t have the patience to wait for my busy woodworking husband to find the time to make one for me.  Wandering through the studio I laid eyes on some of that big 2” block insulation---hmmm, foam, easy to cut….need a saw.   Scanned the room, which is also his woodworking section of the building; couldn’t find a saw.  Typically easily defeated, I gave up the idea.   Or so I thought.  
     Couldn’t believe there wasn’t a hand saw in there among all those other tools so I went to look again.  Voila!  Hanging on a nail on the wall!  I was in business.  
     I went to my wheel and got my little paper protractor from my tool cup and promptly marked off a 60 degree angle on the edge of the insulation.  With four roofing nails on one side and four drywall screws on the other I “nailed” the thing to the side of another piece of insulation.
     I marked off a 45 degree on the edge of another piece and did the same thing.   They’re not pretty, but they did the job well enough for me to know how they work and that they work.  I see now that they don’t need to be so long, (This very same day I found the lost magazine that contained the article.  Serendipity.)
     I also feel that since I have drawn the lines of division on the bat, I should be able to create the geometric forms by pushing out on the lines and in against the side with something flat.  I’m glad I found the article because I seldom recall all the details, like “put a slip of wet newspaper on the clay so the angle tool does not stick”.   It’s the details that’ll get ya.
So, here are the jerry-rigged angle tools:  Pretty clunky to say the least!


And here are the two prototype pots:


     I kind of like the marks made by the roofing nails...
     When I was in Adobe resizing these photos, I could see the details and found myself trying to use the computer program to correct the imperfections on the pots as if I had a sponge in my hand…I had to smile.  

And here is the last pot to be made of the first ever batch of Standard 266 brown clay.   I think I love it. 

     Cleaned up the pottery corner, washed all the tools, vacuumed the floor, and brought in fresh water.   Now, on to the S213 midrange porcelain--another new adventure. 
ttfn    mec

Friday, January 28, 2011

Win Some, Lose some,

      Can someone tell me how to cut out shapes and fill with different colored clay?  How to clean off excess w/o it spreading over the surface? 

       I’m running out of the brown Standard 266 and transitioning back into white stoneware  (S240).   I thought at first to clean all the tools and wheel and be real careful about getting any brown clay into the white, but it appears that’s not such an issue:  the white clay cleans up nicely with a bit of a sponging and when glazed any change in coloration will be covered.  I would only worry about it if I knew I was going to use a transparent glaze on the white.  


     For this little bowl I recycled the scraps of each color and layered them before throwing.   I love the surprise when the brown looking bowl gets trimmed everywhere and turns marblized!


     I would be more proud of these three little gems if for each I hadn’t begun with three times as much clay and lost it.   Ho Hum.   


I’ve been more creative in my finishing lately, making texture and designs on outside surfaces, but I seem to have developed some bad habit which is making my pots uneven in thickness at the lip and losing center.   Perhaps I’d best return to just throwing and concentrate on technique for a while.

Today I’ll finish up the three small pots pictured above and work up the scraps of stoneware plus some scraps left from clay colored for marbleizing.  When all that is cleaned up I’ll move on to the 25 lbs. of mid-range porcelain that sits waiting.    shudddddder shuddddder shudddder      ttfn

Sunday, January 23, 2011

Waxed and finished pots from First Pit Fire

     In an earlier post I said I would show images of the pots that came from the pit firing.   Here they are.  I put them together in Adobe Photoshop to show four views of each pot. 

     First is an image of the pots in the pit with a grid overlay to show what chemical was sprinkle in and around each pot.


Friday, January 21, 2011

Experiment gone right...

     I was going to try an experiment to make a pitcher with handle and spout being actually part of the pot.  (I apologize to anyone who may have already done this, I don’t mean to copy.   I think I see things and they percolate through my consciousness until I suddenly think I made them up myself.) 

     In my attempt I used more clay than I usually do, coward that I am, and was so thrilled to pull this big vase I didn’t have the heart to distort it to do my experiment.
     btw my photos are looking pretty fuzzy, if anyone has any tips, let me know.  I take them in VGA setting and change them to 5” (dpi 72). 

   So, with the blob of clay I had cut off the big piece, I tried my idea on a small scale.  I am thinking I might cut the piece out between the spout and the body of the pot, but then it might look more like an ordinary pot.  I kind of like the flat section there between the two. 

This photo was taken immediately after throwing and the thing is very soft and wet.  I’ll work on it tomorrow to clean it up and take another photo for another posting.   I can see where a bottle brush would be needed to clean the inside and the spout on a pitcher this size, that’s why I had originally thought to make it large enough so the neck would accommodate my hand.   If I ever am able to throw another tall cylinder, I’ll try again.  

I’m about out of Standard 244 so I’ll be going back to my Standard 240 white stoneware in a week or so.   Looks like I’ll have to put all my tools and sponges through the dish washer and washing machine before I get back into the white clay. 
ttfn

Thursday, January 20, 2011

Plaster of Paris in my Clay

     I am a Sunday Potter, don’t forget, and I work on a mini-scale.  I only had Plaster of Paris available to make my little drying bat.  (to make it I slathered a plastic box with Vaseline, placed an upside-down baking dish, also slathered with Vaseline, in it and poured plaster over it and held it down until the plaster set; or did I set the baking dish upright in the plaster and weigh it down being careful not to let plaster seep over the wall into the baking dish?

     The issue here is that the plaster is not a satisfactory substance for drying my clay—you see the coating of plaster on the bottom of my dry clay in the upper photo?   I just realized that that coating was also on the bottom of all my white clay and I never would have seen it.   ughhhggjjhgjdjd##$@#$!@#$
 

SOLUTION:  I line the bat with a piece of old, thin bed sheet material.  The water soaks through the sheet to the plaster.   This is the first time I tried it and it worked perfectly!   I love it when a plan comes together.

By the way, who can tell me what the plaster does to the clay?  I’ve been carefully taught never to allow plaster into my clay but never knew the result.

Tuesday, January 18, 2011

Friends come to play!

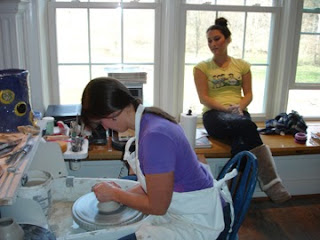
     A couple of friends, one who teaches ceramics at the high school level, one who is majoring in ceramics at the university (and spent a semester in China studying ceramics!) came to visit and mess around in clay.   It meant a lot to me that they would spend their precious vacation time hanging out at my place.


Karlee made these baskets to show me how to cut and alter their shapes, I added the handles.

I've spent enough time waiting for pictures to download into this blog today.  More some other day, much to say, much to show.  ttfn

FIRST PIT FIRING

   I spent months procrastinating the pit fire.   Over these months I collected the various materials books and friends had recommended:  copper wire (stripped old extension cords)  horse hair, rock salt, Kosher salt, table salt, copper carbonate, powdered rutile, miracle gro, newspaper cobalt carbonate.  

     I went out to our usual campfire spot in the back and began to dig a 2' x 2' pit.  I managed to get a foot all 'round before I lost my enthusiasm for digging.   It wasn't more than a day before my super-hero husband finished the job for me. 


The pots came out nearly unmarked on one side, except for the ones wrapped with copper wire which left a line and rust colored flashing.   
QUESTIONS:
Did the fire under grill create the markings or the burning stuff resting on top of the pot?
If I had put pieces directly into sawdust/newspaper in bottom of pit instead of setting them on a grill, would the coloration be more uniform around them?  


I sprinkled the powdered chemicals* onto the pots and into the area around them.
QUESTION:
If I had dissolved the chemicals* and applied them as a wash would I have seen more coloration on the pots?
*Rutile, cobalt carbonate, copper carbonate, miracle gro, salts, baking soda, soda ash, magnesium oxide, red iron oxide.
                                                   

I used aluminum foil to wrap a feather against the side of a tall cylinder.  No evidence of foil or feather remained. 
QUESTION:
Was the fire too hot for the feather to leave carbon trace on the pot?

One of the pots came out with hard little black and blue bits melded to it.
???????

I can't seem to insert any more pictures, I'll try in another posting to show some of the finished pots.   ttfn


Sunday, January 16, 2011

New Beginnings

It's been almost a year and I have accumulated quite a supply of greenware.  My new Bailey Potter's wheel is a dream!!  So glad I bought the two side worktables with it.  It's a Pro-X which is probably way more wheel than I'll ever need, and is serving me well.  eeeew, the brown clay is making it look so messy!   I usually use mid-range porcelain and cone 6 stoneware but decided to experiment with the brown (Standard 266) for the fun of it.  
     The brown clay seems to inspire me to be more creative and freer with textures and forms than I am when I use the white clays.  I feel compelled to create more delicate refined forms with white. 


     As a beginner I am practicing as many forms as I can.  I've decided to try all the lessons in the Clay Times magazine.   I've done two so far. 

I'm glad I'm not a production potter--can't make the same thing twice, either spiritually or physically!  ttfn