Total Pageviews
Thursday, May 3, 2012
The Studio Setting
I can't believe how lucky I am. It's as if I live in an artist's retreat! Peaceful, alone, private and, thanks to Terry's building and design skills, beautiful! Here are the steps up to my wheel room (really it's my sister-in-law's apartment but she never has a chance to come use it so I took it over (:)
From the deck at the top of the steps I have three beautiful views, one to the road, one to the big house and it's atrium garden and one not pictured which is the hillside right next to the deck.
When I work I have two visitors outside the door waiting for a treat when I leave:
When work is done, down the steps I go...
ttfn
Wednesday, May 2, 2012
I hate the new blogger format and cannot make it work for me. Sorry for this being all in one paragraph and I think I just cut out one of my photos. Looking for a new blog media!
Spring is here, summer almost, and the yard and garden have again taken over my blogspot.
We spent the weekend April 14/15th at the Keith Lahti Lidded Forms Workshop at the Capitol Clay Arts Company in Charleston, WV. I knew a little bit about lids but only what I’d gleaned from reading articles in magazines. It was wonderful to work with a pleasant group of fellow potters all eager to learn new techniques and tips.
The lunches Karen served—huge delicious pizza one day and delectable Chinese dishes on Sunday—were enough to make me want to go back again anytime!
We stayed at the Embassy Suites and enjoyed their manager’s special, their swimming pool and hot tub, their spacious suite and then in the morning we had the breakfast buffet! It was a combination “pottery and celebrate Terry’s birthday month” weekend.
While waiting for my workshop Terry discovered the wonderful historical museum of West Virginia that is housed in the downstairs of the Cultural Center. He was very impressed with the professionalism of the place and all the way home I learned about the history of our beautiful state.
All in all a good time was had by everyone!! Thanks Karen and Mike Garnes and Kieth Lahti!
This last vase I did by following the directions in my latest Pottery Making Illustrated magazine. Quite a challenge but that's what I like best!
Tuesday, January 17, 2012
19th FIRING, 12th GLAZE FIRING!
Thanks to the kids at Wirt County High School for telling me about their favorite glazes--now they are my favorite glazes too!
The front mug above and the back mug below were made by Karlee Wyer. I hope she doesn't think she's ever going to get them back! (:
Below my poor teapot: the lid stuck to the body. I've ground it a bit with the Dremmel, tried hot water, now I've poured in some water and put it in the freezer to try Diana's suggestion of letting it melt a bit and see if the block of ice will drop down and release the lid when turned upside down. If that doesn't work, I'll grind it some more. My, but it's a strange glaze,eh?
These mugs are my all time favorites!!!!!!!!!!!!!!!!! (Sorry it's such a poor quality picture.)
Thursday, January 12, 2012
2012 BEGINS!
HAPPY NEW YEAR, EVERYONE!
The cup below is my husband's favorite. It is a mixture of S240 and S266 (proportions unknown, I just threw the scraps into a heap). I finally made the handle large enough for his fingers and the body is full size. The glaze inside matching the glaze on the handle gives it unity and the clear over the slip on the outside adds interest and variety. The white band around the shoulder is made by painting white S240 slip on the form as it turned on the wheel just after trimming. (Slip must be added while the piece is leather hard else it will not meld with the body and will flake off.) A toothed tool was run around the slip to reveal the body color in the brown lines.
The common comment about my works has been that they are small. I can't get over how much clay shrinks as it dries and during the two firings. This vase is an attempt to force myself to work larger. At first it seemed such a waste to use a 3 or 4 pound blob of clay for just one piece, but after hearing all the compliments, I think I'll start going for 5 pound blobs!
Below is the same piece glazed. I used Pam's Blue inside (poured in and poured out as I turned the vase over the jar of glaze). On the outside I painted Coyote Cone Six Forest Satin glaze and fired to cone six. I don't know why it cratered this way but I love the effect. Will try it on a little brown casserole made of the same clay. I'm always surprised that this terra cotta colored bisqueware fires out to a deep blackish brown!
Above: Bisqueware waiting to be glazed Left: Greenware waiting to be bisqued.
The pots below are basic Coyote Really Red and Cobalt glazes over a Standard Layering Glaze which was painted on the pots. I like the effects, but I'm not crazy about the primary colors. I'll be trying the layering glaze with other colors in the next firing.
The next "assignment" is to practice throwing plates. My potter/friend came over and demonstrated how she makes them; she's a former Tamarack artist so I've had excellent instruction. Now let's see what I can do with it!
ttfn
Thursday, December 8, 2011
Dreaming of a gas kiln...
Serendipity! The fellow who installed our generator just happened to have a pile of firebricks in his back yard that was in his way. He and his friends were happy to get rid of them, and we were happy to take them off their hands. Our friends agreed to help us and lent their truck and trailer--just like the days of yore when hippies shared labor. We are waiting for him to call for us to help him with a big job at his place.
One load of good firebricks, heavy suckers they were, is loaded into the back of our friend's truck!
On the left are the light weight insulators, on the right are the HEAVY firebricks.
The brigade system required that one of the four of us was installed in the back of the truck! This time it was Marvin's turn.
We filled the wagon one box at a time!! Like ants we moved the pile from place to place.
Early morning start for the second day of gathering.
We promised to clean the place up, so we were compelled to collect the pile of rubble as well as the whole bricks that were neatly stacked. The rubble will be used as fill in the driveway or as a decorative wall somewhere in Terry's imagination.
Not to miss a thing, we of course carried away the old form for the curved top of a kiln.
Unloading the first of two big loads of bricks.
One of the pleas of the givers of the bricks was that the bricks would not sit in a field for years to come. Hopefully we can keep that hope alive...
Sunday, October 23, 2011
WORRIES AND WONDERINGS
I constantly worry that I am not getting enough or too much glaze on a piece. I have yet to have the Coyote glazes drip onto the shelf, but I have found thin spots of glaze that are rough and unpleasant to touch. I poured the glaze over these big bowls in hopes it would be thick and creamy without running.
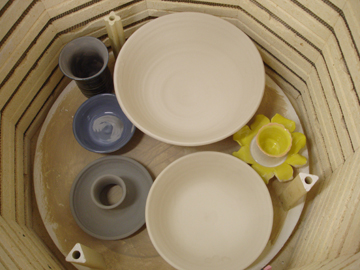
I am tucking small re-do pieces under the edges of the big bowls.
This week is the last opportunity to fire before going to the 'fair' in Doddrige County in Smithburg. First time to try to sell my wares.
The kiln room is finally going to be a nice warm room. This is the new radiant gas heater Terry installed today. Makes the place toasty warm!
This is the autumn view from the door to the kiln room. What a pretty day today.
Sunday, October 16, 2011
LESSONS LEARNED
LESSONS LEARNED
In an effort to fire several special plates, I put a shelf at the top of the kiln with an inch of space between the pieces and the lid.
RESULT: apparently the air was prevented from circulating correctly, and the heat was trapped inside the kiln getting the pieces too hot.
Several pieces bubbled, and two pieces warped.
This bowl warped and tipped a bit on its stilts. I wonder if the warping is because the white clay is a different strength than the brown? There are some cracks between the base and the wall also. A discard.
This bowl is Pansy Purple and the white over it is mottled. I thought the glaze was too thick so I put it on stilts to keep any runny glaze from sticking to the shelf. The wires of the stilts bent, the tips stuck in the clay, and the base of the bowl warped. Another discard!
This is the smaller of the the two baskets Karlee and I made. Too much heat caused the glaze to bubble. Hate to discard one made by Karlee, but...
The handle cracked on this pitcher and I prefer the flower motif done in purple as seen in an earlier post.
When the white glaze is very thick, as it was here, it has a tendency to "crawl", or separate leaving bare spots. In this case it is also over a layer of peachy shino. The effect might have been awesome on the side of a big vase, but not on the mouth of this one. Oh well.
The green on this vase is from copper carbonate slip painted on the leather hard stage. At the bisque firing it was an icky brown, but with the higher temps of the glaze firing it comes out a nice green! See the plate below.
This daffodil was in an earlier post when it was still bisque ware. Testing the Coyote Cone Six Buttercup glaze.
These are the three of the five plates I wanted to fire and which caused me to decide to put in a last shelf at the top of the kiln. Glad they came out ok. Too rough on the bottoms but I will reglaze them and fix that. Still getting used to how thick to paint the glazes.
Other than that it was an ok firing (I haven't shown you the acceptable pieces), except that the colors seemed to me to be quite ordinary—like a yard sale where nothing belongs to anything else and can’t quite stand alone.
There are several pots I’d like to refire, but will do that after all the bisque has been glazed, then go back for a final re-do load. Going to a fair in Smithburg the weekend of October 29-30 and want as many pieces finished as can get.
Back to the glazing table.
Subscribe to:
Posts (Atom)