Total Pageviews

Thursday, December 8, 2011

Dreaming of a gas kiln...

Serendipity!   The fellow who installed our generator just happened to have a pile of firebricks in his back yard that was in his way.   He and his friends were happy to get rid of them, and we were happy to take them off their hands.    Our friends agreed to help us and lent their truck and trailer--just like the days of yore when hippies shared labor.  We are waiting for him to call for us to help him with a big job at his place. 


One load of good firebricks, heavy suckers they were, is loaded into the back of our friend's truck!


On the left are the light weight insulators, on the right are the HEAVY firebricks. 

The brigade system required that one of the four of us was installed in the back of the truck!  This time it was Marvin's turn.


We filled the wagon one box at a time!!  Like ants we moved the pile from place to place.


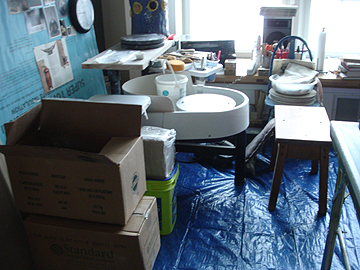
Early morning start for the second day of gathering.


We promised to clean the place up, so we were compelled to collect the pile of rubble as well as the whole bricks that were neatly stacked.  The rubble will be used as fill in the driveway or as a decorative wall somewhere in Terry's imagination.  


Not to miss a thing, we of course carried away  the old form for the curved top of a kiln.

Unloading the first of two big loads of bricks. 

One of the pleas of the givers of the bricks was that the bricks would not sit in a field for years to come.   Hopefully we can keep that hope alive...

Sunday, October 23, 2011

WORRIES AND WONDERINGS

I constantly worry that I am not getting enough or too much glaze on a piece.  I have yet to have the Coyote glazes drip onto the shelf, but I have found thin spots of glaze that are rough and unpleasant to touch.  I poured the glaze over these big bowls in hopes it would be thick and creamy without running. 

I am tucking  small re-do pieces under the edges of the big bowls.  


 This week is the last opportunity to fire before going to the 'fair' in Doddrige County in Smithburg.  First time to try to sell my wares.


The kiln room is finally going to be a nice warm room.   This is the new radiant gas heater Terry installed today.   Makes the place toasty warm!


This is the autumn view from the door to the kiln room.   What a pretty day today. 

Sunday, October 16, 2011

LESSONS LEARNED

LESSONS LEARNED

In an effort to fire several special plates, I put a shelf at the top of the kiln with an inch of space between the pieces and the lid.

RESULT:  apparently the air was prevented from circulating correctly, and the heat was trapped inside the kiln getting the pieces too hot.   

Several pieces bubbled, and two pieces warped.


This bowl warped and tipped a bit on its stilts.  I wonder if the warping is because the white clay is a different strength than the brown? There are some cracks between the base and the wall also.   A discard. 


This bowl is Pansy Purple and the white over it is mottled.    I thought the glaze was too thick so I put it on stilts to keep any runny glaze from sticking to the shelf.   The wires of the stilts bent, the tips stuck in the clay,  and the base of the bowl warped.  Another discard!


This is the smaller of the the two baskets Karlee and I made.  Too much heat caused the glaze to bubble.   Hate to discard one made by Karlee, but...


The handle cracked on this pitcher and I prefer the flower motif done in purple as seen in an earlier post.


When the white glaze is very thick, as it was here, it has a tendency to "crawl", or separate leaving bare spots.   In this case it is also over a layer of peachy shino.   The effect might have been awesome on the side of a big vase, but not on the mouth of this one.   Oh well.

The green on this vase is from copper carbonate slip painted on the leather hard stage.   At the bisque firing it was an icky brown, but with the higher temps of the glaze firing it comes out a nice green!   See the plate below.


This daffodil was in an earlier post when it was still bisque ware.   Testing the Coyote Cone Six Buttercup glaze.


These are the three of the five plates I wanted to fire and which caused me to decide to put in a last shelf at the top of the kiln.   Glad they came out ok. Too rough on the bottoms but I will reglaze them and fix that. Still getting used to how thick to paint the glazes.


Other than that it was an ok firing (I haven't shown you the acceptable pieces), except that the colors seemed to me to be quite ordinary—like a yard sale where nothing belongs to anything else and can’t quite stand alone.


There are several pots I’d like to refire, but will do that after all the bisque has been glazed, then go back for a final re-do load.   Going to a fair in Smithburg the weekend of October 29-30 and want as many pieces finished as can get.

Back to the glazing table. 

Sunday, October 9, 2011

I WISH I WERE TWINS!

I am having so much fun glazing these funny little pots I wish I were twins.   Somedays I think I can't get an idea of what to do, then the pots tell me what would be fun and voila!  a new decoration!
 Sorry for the poor Adobe work, but I'd rather spend my time out in the glazing room....

The white with the purple flowers is a new motif I love for the vases that have shoulders to display them.   Inspired by the Ironweed that is in bloom during these fall days, I'm doing it on lots of pots.  


That same motif turned blue on the Light Blue Shino Glaze.  How cool is that?
Under all that plastic are pots waiting to be glazed.   I have no more greenware!  I hope tomorrow I'll fill the kiln so Tuesday can be another firing and Wednesay another opening!

Thursday, September 15, 2011

EXHAUST HOOD/FAN IS INSTALLED!

This exhaust hood is made from a huge piece of sheet metal.   Terry fashioned it in a couple days and installed it in one day.   Today he added the brass fan switch and wired up the electricity.   Can you believe this man can do ANYTHING!?


This is the front view.  There are two metal brackets that go to the wall that stabalize the whole thing.  The chains from the ceiling, well, they hold it up!! (:


The corner of the room where the kiln sits is to the left of the entry to the building.  There are shelves to the left of the kiln, a table where I glaze, and whenever the heat is connected, my wheel will go to the right of the entryway.   I love my little ceramics building!   Livin' the dream!

Thursday, September 8, 2011

TWO GLAZE FIRINGS DOWN...

The kiln is loaded for its first glaze firing.   This will be the first time the old girl has been asked to make it up to cone 6 (approx. 2230 degrees!).   Will it work?  Will the house burn down?  Will the kiln die?...


The firing is done and all is well.


     Below is the second shelf of the first firing.   Deanna's tiles are in a tile setter and unfortunately they warped and some even stuck together.  No more tile setter for us!   The ones on the top shelf (see above photo) did not warp as much--almost not at all.   The corners of the square one lifted slightly, the round one stayed flat.
   The gray mugs are glazed with Coyote Cone Six Light Blue Shino.


     Below is the second firing.  Deanna's buttons are scattered among the pots.   The orange pots are glazed with Coyote Cone Six Peachy Shino.  The "tulip" pot is multi-colored using Amaco Decorating Underglazes with Coyote Clear over them.  Notice the brown?  I mistakenly thinned the Coyote Light Blue Shino (see the gray mugs above) and lost all the gray/blue coloration.  ):


Time to get busy glazing more pots!!    Off to Capitol Clay Arts* in Charleston for more glazes!

*The best (and only) little clay supplier in West Virginia!

FIRST FIRING EVER!

At last!   The kiln has been wired up and is functioning.   I have done two bisque* firings.


Now it's time to glaze...eeek!   This is the make it or break it stage.  A beautifully made pot can be ruined by a lousy glaze or a lousy glazing job. 

*the first firing which changes raw clay to pottery by heating it so high that it transforms into its hardened  permanent state.  The temperature of this  firing is lower than the glaze firing to keep the clay absorbent.  It is necessary for the pot to be somewhat absorbent to accept the glaze.    When the glaze is applied it adheres because the water in the glaze soaks into the pot leaving the powdered ingredients on the surface. 

Thursday, May 5, 2011

SIX IN ONE DAY


Maybe it pays to stay out of the studio for a week or two at a time.   This time I went in and was on a roll.  I had worked up six pieces of clay and used them all within just a couple hours.  The one at the back, with the points has since been recycled as I just didn't care for the form.  The pitcher on the left might have to be recycled as well because the split in the vertical of the handle doesn't want to fill or be filled. 
lol I just noticed the time on the clock in the background.  
Spring and yard work have taken a toll on my time and energy, I hope anyone interested in my blog will bear with me.   I'm sure after the first frost I'll be in better form.  (No pun intended.)

Tuesday, April 19, 2011

LOST AND FOUND

LOST AND FOUND

I LOST the teapot when it rolled off the wheel as I trimmed it.   Bang bangy bounce bounce!  Lots of dents and deformities.   I ripped it open to see the walls and FOUND that they were Thin!!!  Goal #1one--met! 
I already had the handle and spout prepared so instead of junking them  I attached them, just for practice.  FOUND that when I don’t sweat the small stuff I can work the clay with more efficiency and FOUND that there is a lot more manipulation that goes on in creating a finished piece than I had realized.  Things don’t just fall out of our fingers.  We have to smooth, bend, adjust, repair and smooth again.  I FOUND it’s not a bad thing to work the project after making it, that’s part of making it.   (Could this be construction/deconstruction?)


     I had LOST the vase on principle because I felt it was too thick.  So I used it to play and experiment with decorations:  I stretched a small mesh garlic bag over the top of the vase and pressed a design into it that surrounded the spirals I had pressed into it with a cork stamp.   Again I FOUND that when I am more aggressive in my approach and more uninhibited like Piesecki, my work improves.  I LOST the vase when I trimmed through the side.   Haven’t done that in Years!  

All the new clay used for these two projects is now being slaked and my fragile ego is healing.  I’ll use the yard work as an excuse to stall for a bit.   If I’m not careful though, I’ll stall and find 150# of hard clay in my bins.   Would serve me right!

ttfn
mec

Monday, March 28, 2011

CLEAN WORKSPACE, NEW CLAY!

We went to Charleston Saturday and bought 50# each of Standard 213 porcelain, 240 white stoneware, and 266 dark brown clay.  In honor of their arrival I put down a brand new tarp on the floor to protect the wood and to look better than the skanky old tarp we had used originally.   


Here is the view from my work space.  (Poor me.)  Thanks to Terry for letting me use his apartment project until the real ceramic studio is finished. 


I put 25# each into empty cat litter containers.  Two of them have plaster in the bottom, four of them do not, I think the airtight lid will work to keep the clay moist without the plaster, and of course I left the clay in their original plastic bags.  I hope I’m right, that’s a lot of clay to re-soften if it gets hard!


I won’t be working in clay until next week, after special company comes.  I want the work space to look its best and I’m not very tidy when working in clay, that’s for sure!

ttfn
mec

Wednesday, March 23, 2011

TEAPOTS ARE A LOT OF HARD HANDWORK!


TEAPOTS ARE A LOT OF WORK!!!!!!!!!!!!!!

     It took three tries to get the handle on my first (volunteer) teapot, no telling if it will fall off or make it through the firing.  AND, I do not like the little hairline crack that is appearing at the top of the spout…


Here are the parts for the second teapot.
The lid is the hardest to make because it has to be made to fit the mouth of the body.  I still haven’t learned how to make the little doodad that hooks into the rim of the gallery so the lid won’t fall off when you pour.   For one thing, I think my gallery is too thick, flows too easily into the body and so does not allow a place for a “hook”.  Because of this there is no horizontal surface on which to hook the hook.   This time I did not hang the pulled handle on the edge of the board (remember last one fell off its perch and cracked), and did not wait as long to shape it to the pot.

I used an old button to form a design on the top of the lid handle:


I say the lid is the hardest, but that’s what makes it fun, because it’s a challenge.  I love all the processes of messing in clay, so the recycling of inadequate thrown pieces is just another excuse to cut and slam and knead the clay.   My only concern about that is that the porcelain (Standard 213) seems to lose a little creaminess after three or four recycles.   Hope I’m not losing some major ingredient the absence of which will manifest during the firing.    

So, TA DAH...........here are the finished teapots.  


The one with the line decorations will probably have to be a sculpture because the thing is so heavy.   I refuse to recycle the clay to try again.  Three times is two too many.  (See the design from the button on top of the lid handle?)
Well, folks, I’m out of clay.  
I won’t be posting any more until we make a run to Capitol Clay Arts in Charleston, WV (the best little clay distributor/ceramics classes I know).  

Rest in Peace, Elizabeth Taylor.

ttfn
mec